Cervical Laminoplasty
Abstract
Cervical spine laminoplasty is a treatment for multi-level cervical spondylotic myelopathy (CSM) without accompanying instability or cervical kyphosis. The goal is to decompress the spinal canal and relieve pressure on the spinal cord without destabilizing the spine.
CSM is caused by impingement of the spinal cord by degenerative bony and ligamentous structures that decrease the volume of the canal. Surgery reliably halts stepwise deterioration in neurologic function (e.g. loss of fine motor control, altered gait and balance).
CSM may be treated surgically through multiple approaches (anterior, posterior), with or without concomitant nerve root decompression, and with a variety of techniques (laminectomy, open-door laminoplasty, double-door laminoplasty).1 The video accompanying the article demonstrates a classic open-door cervical laminoplasty.
Case Overview
Focused history
The patient with CSM may report neck pain and stiffness and very often headaches in the occipital region. Diffuse non-dermatomal patterns of numbness and paresthesias may be present. The patient may report weakness and have decreased manual dexterity manifested by dropping objects and having difficulty manipulating fine objects.
Gait disturbances are a strong indication for surgical intervention. The patient may report feeling unstable on feet and/or have weakness walking up and down stairs. Gait and balance can be evaluated by asking the patient to perform a heel to toe walk and a Romberg test. Urinary retention is a rare and late finding in CSM progression and hard to interpret due to the high prevalence of urinary dysfunction in an older population.
Physical exam
Weakness is often difficult to detect on physical exam. If present, lower extremity weakness is a very concerning finding. Proprioception dysfunction indicates dorsal column involvement and is also associated with a poor prognosis. Decreased pain or temperature sensation indicates involvement of the lateral spinothalamic tract. Decreased sensation to light touch is due to dysfunction of the ventral spinothalamic tracts.
Specific tests:
- The “finger escape” sign occurs when a patient holds fingers extended and adducted and their small finger spontaneously abducts due to weakness of the intrinsic muscles of the hand.
- The “grip and release” test is a fairly sensitive test for myelopathy affecting the intrinsic muscles of the hand. A patient without dysfunction should be able to make a fist and release it 20 times in 10 seconds.
- The inverted radial reflex is ipsilateral finger flexion when tapping the distal brachioradialis tendon.
- Hoffmann's test is performed by snapping the patient’s distal phalanx of their middle finger. Spontaneous flexion of other fingers is a positive sign.
- Sustained clonus (>3 beats) on reflex testing has a low sensitivity (about 13%) but close to 100% specificity for cervical myelopathy. However, spasticity and hyperreflexia may be absent when there is concomitant peripheral nerve disease (e.g. cervical or lumbar nerve root compression, spinal stenosis, diabetes).
- A positive Babinski test (great toe dorsiflexion) indicates damage to the corticospinal tract.
- A Romberg test is performed by having the patient stand with arms held forward and eyes closed. Loss of balance is consistent with posterior column dysfunction.
- The Lhermitte sign is present when extreme cervical flexion leads to electric shock-like sensations that radiate down the spine and into the extremities.
Classification systems for CSM
Several classification systems exist for CSM:
Nurick Classification- Grade 0 Root symptoms only or normal
- Grade 1 Signs of cord compression; normal gait
- Grade 2 Gait difficulties but fully employed
- Grade 3 Gait difficulties prevent employment, walks unassisted
- Grade 4 Unable to walk without assistance
- Grade 5 Wheelchair or bedbound
- Class I Pain, no neurologic deficit
- Class II Subjective weakness, hyperreflexia, dysesthesias
- Class IIIA Objective weakness, long tract signs, ambulatory
- Class IIIB Objective weakness, long tract signs, non-ambulatory
A point scoring system (17 total) based on function in the following categories:
- upper extremity motor function
- lower extremity motor function
- sensory function
- bladder function
Imaging
RadiographsInitial evaluation should include Cervical, AP, Lateral, Oblique, and Flexion/Extension views of the cervical spine. It is important to remember that radiographic findings do not always correlate with symptoms. 70% of patients >=70 years old will have radiographic evidence of degenerative changes. Findings to look for include degenerative changes of uncovertebral and facet joints, osteophyte formation, disc space narrowing, and a decreased sagittal diameter of the canal. The normal cord diameter is about 17mm and cord compression occurs with a diameter <13mm.
- Lateral view: the Torg-Pavlov ratio is the ratio of the canal to the vertebral body width on a lateral view. A normal ratio is 1.0 and a ratio <0.8 predisposes to stenosis and myelopathy, although this rule is not always valid in the case of large athletes.
- Oblique view: best to evaluate foraminal stenosis, which is often caused by uncovertebral joint arthrosis.
- Flexion and extension views: useful to evaluate angular or translational instability and to see evidence of compensatory subluxation above or below the stiff or spondylotic segment.
MRI is the study of choice to evaluate degree of spinal cord and nerve root compression. Myelomalacia shows up as bright signal on T2 weighted images.
Computed TomographyA CT without contrast can provide complementary information with an MRI and is more useful to evaluate OPLL and osteophytes. CT myelography is useful in patients that cannot have an MRI (pacemaker) or who have implants in the area of interest that would produce an artefact. Contrast is given via C1-C2 puncture and allowed to diffuse caudally, or given via a lumbar puncture and allowed to diffuse proximally by putting patient in the Trendelenburg position.
Representative images for this case: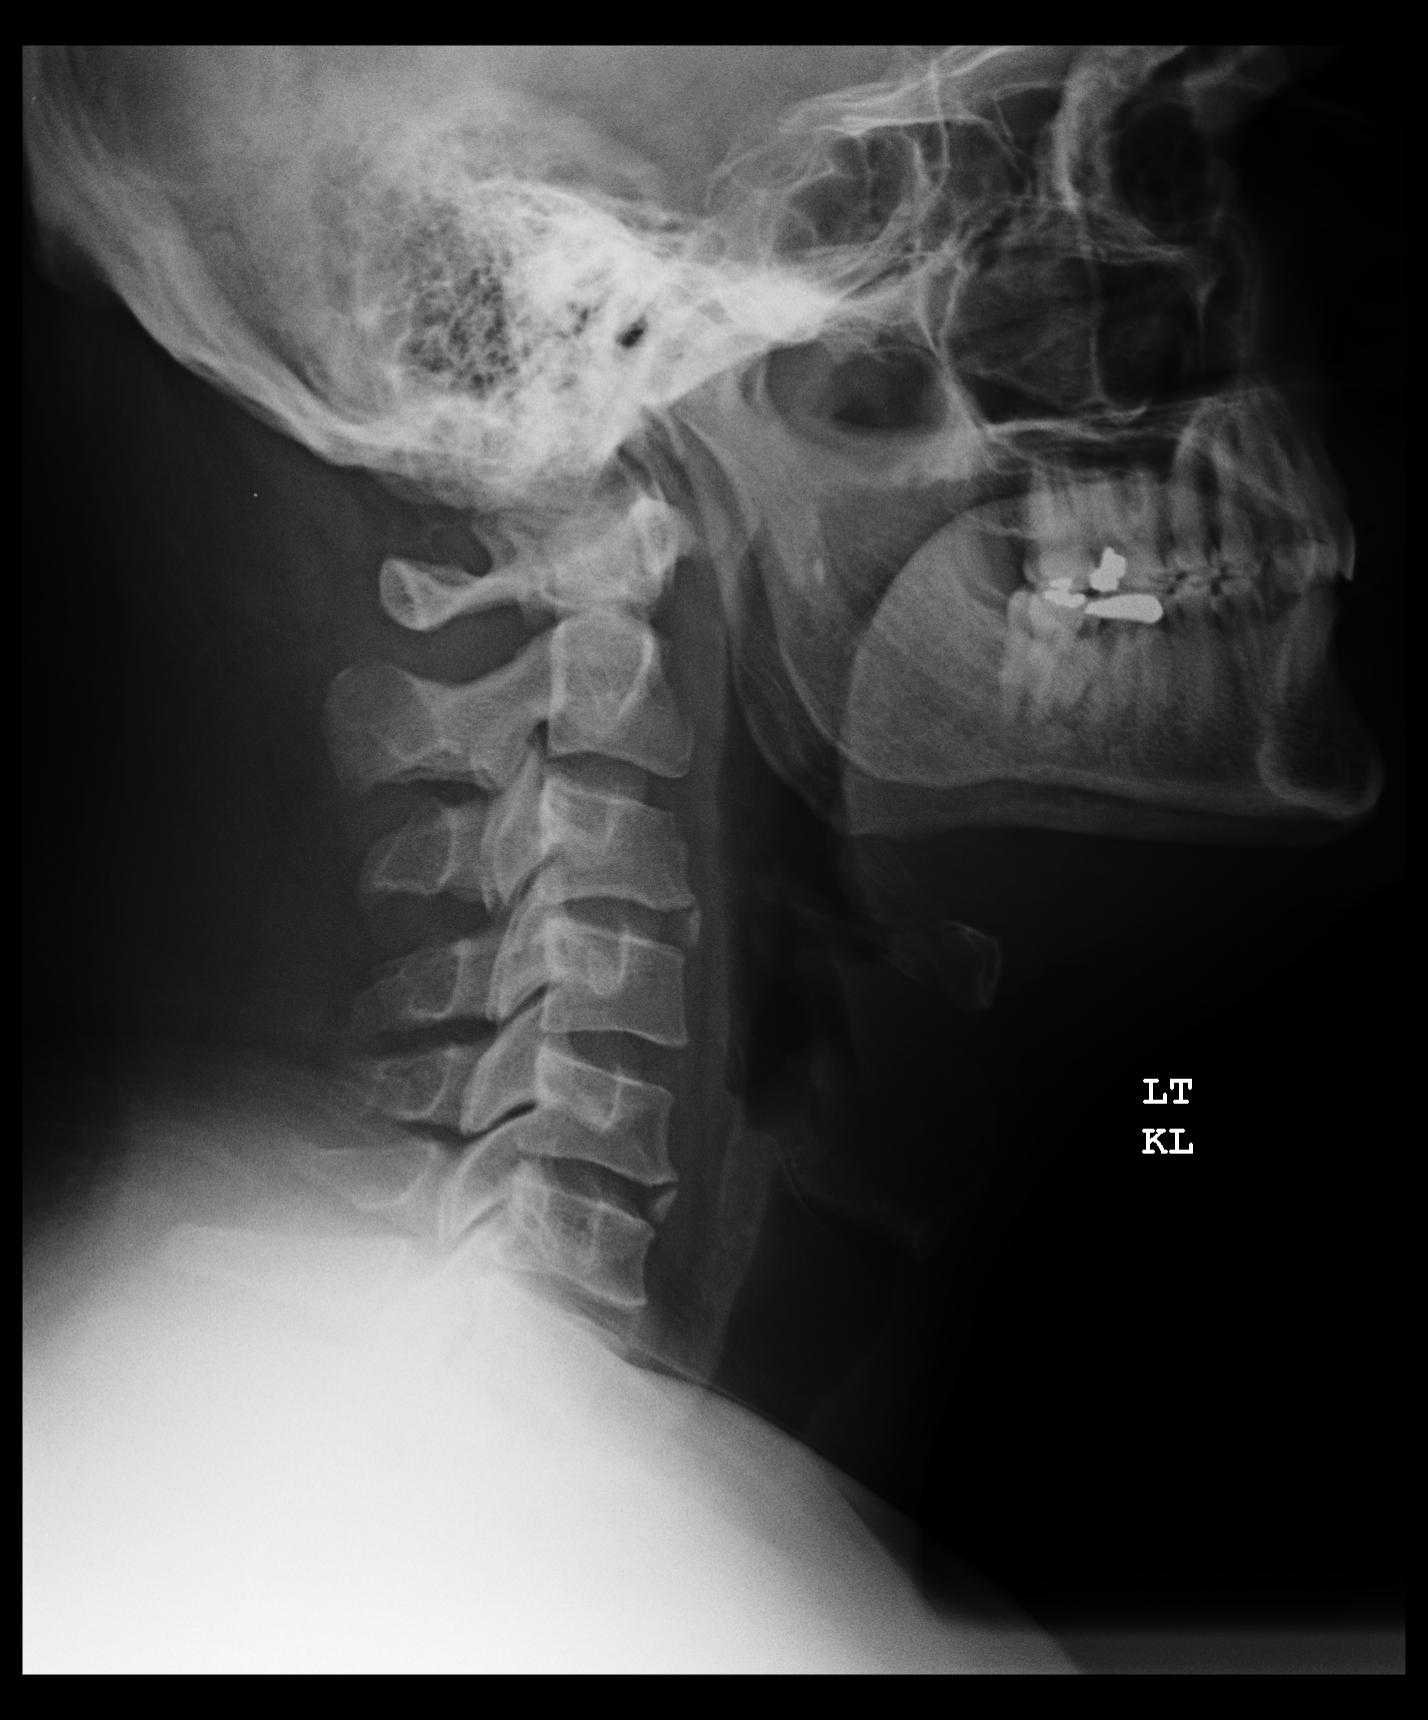 Lateral C-spine
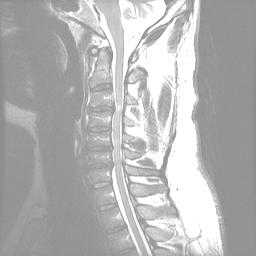 Sagittal T2 C-spine
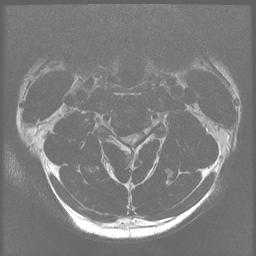 Axial T2 C3C4
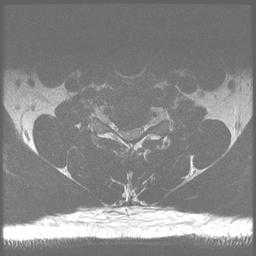 Axial T2 C4C5
 Axial T2 C5C6
Nerve conduction studies
Nerve conduction studies have a high false negative rate but may be useful to distinguish peripheral from central process (ALS).Natural history
CSM tends to be slowly progressive with intermittent periods of stability followed by deterioration, and it rarely improves with nonoperative modalities such as physical therapy.Options for treatment
Aside from conservative therapy the main alternative to this procedure would be surgical laminectomy and fusion with instrumentation. Various other laminoplasty techniques have been described, including a double-door technique (Kurokawa’s method) and a Z-shaped laminoplasty which does not fully excise the laminae (Hattori’s method).Rationale for this treatment
The patient was symptomatic and had failed conservative therapy. The advantages of the open-door unilateral laminoplasty over standard laminectomy and fusion include a more minimally invasive approach, the avoidance of fusion and the possible resultant complications related to fusion, less blood loss and a faster, less painful recovery period.Special considerations
Some patients with CSM may be better candidates for a traditional laminectomy with fusion due to considerations of their anatomy, disease progression, degree of instability and size.Equipment
- High-speed burr
- Lamina retractor
- Escalate Laminoplasty plates, Stryker, Kalamazoo, MI
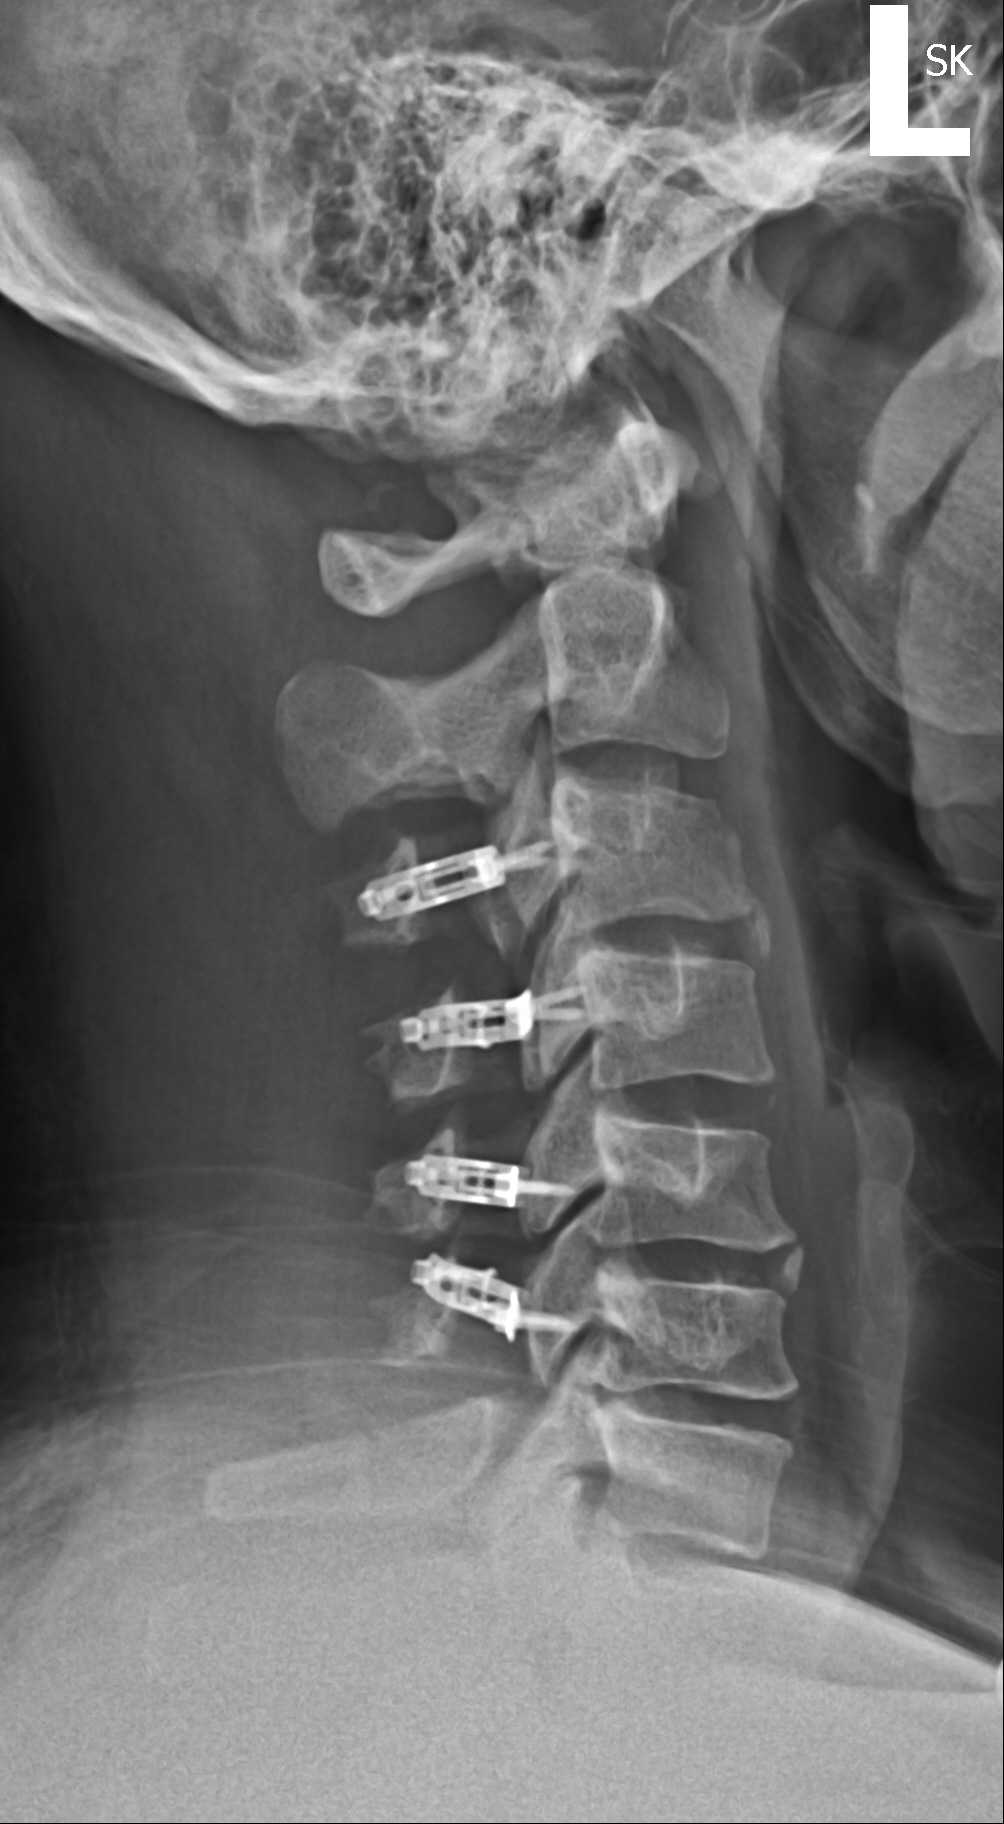
Postoperative Images
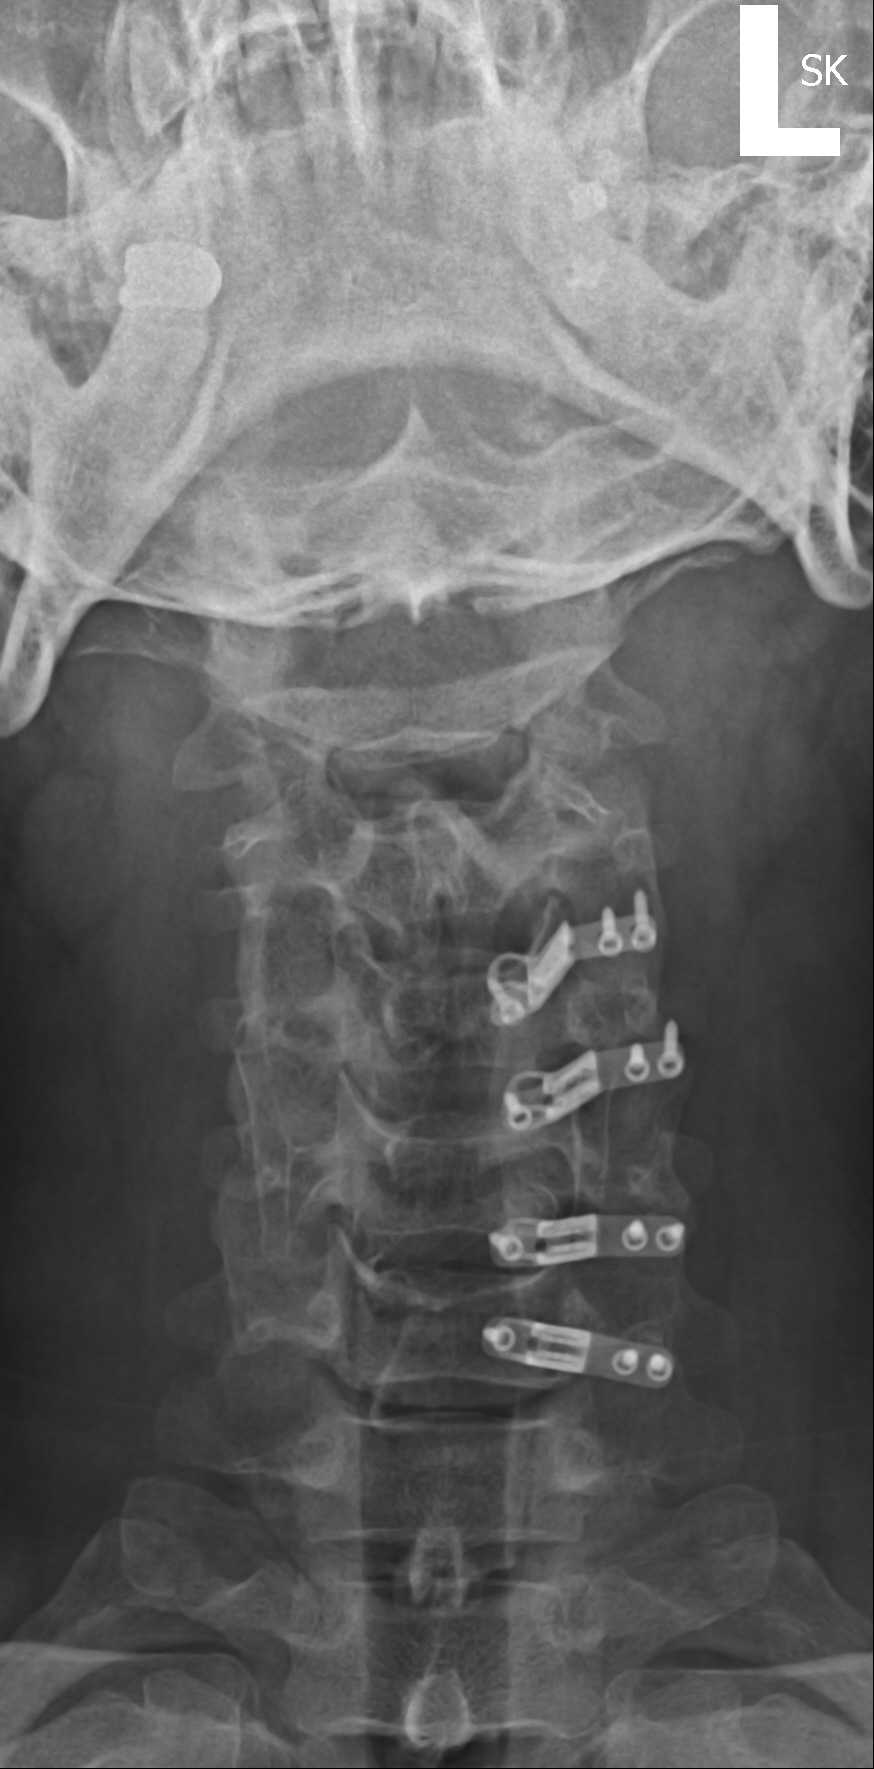 AP cervical spine
 Axial T2 C3C4
Discussion
Cervical spondylotic myelopathy has a variety of clinical presentations, associated pathologies, and surgical treatments. Symptoms attributed directly to the spinal stenosis and myelopathy most often include some loss of fine motor control and altered balance and gait. They may include extremity spasticity and/or weakness and the loss of bowel and bladder function. Symptoms due to concomitant nerve root impingement include extremity pain or paresthesias in a dermatomal pattern, or weakness. Neck pain may also be caused by facet joint arthrosis.
Symptoms usually worsen in a stepwise fashion and are poorly controlled by nonoperative interventions such as soft cervical collars and epidural steroid injections. Cervical spinal canal stenosis is caused by degeneration in a number of structures about the spinal canal. These include: hypertrophic facet joints, thickened ligamentum flavum, ossified posterior longitudinal ligament, bulging intervertebral discs, and/or hypertrophic uncovertebral joints.
A variety of surgeries have been used to address CSM. These include multi-level anterior cervical discectomy and fusion (ACDF), anterior corpectomy and fusion, posterior laminectomy and fusion, and multiple posterior laminoplasty techniques.
The choice of approach, anterior or posterior, is determined by 1) the structures causing spinal cord impingement (as determined by MRI and clinical symptoms), 2) the number of levels of the spinal canal affected, 3) sagittal alignment, specifically the presence or absence of fixed kyphosis greater than 13 degrees, 4) the presence of instability (spondylolisthesis), and 5) surgeon experience.2
If a posterior approach is indicated and the spinal column is stable, laminoplasty is usually preferred. Multi-level partial laminectomy can lead to iatrogenic instability, with kyphosis and/or subluxation. Laminectomy and fusion with lateral mass plates can lead to hardware complications and adjacent segment degeneration.
Laminoplasty allows the surgeon to leave the posterior elements of the spine in place and not perform multi-level fusions. The two most commonly performed techniques of laminoplasty are the open-door and double-door (or “French-door”) techniques. Dr. Jenis demonstrates the open-door technique with this patient.
Outcome data for laminoplasty surgery is limited. Steinmetz et al showed recovery rate postoperatively to be between 50-70% with recovery stable through an average of 12 years.5
Wang et al reviewed 204 cases of open-door laminoplasty performed between 1986-2001. All patients presented with symptoms and magnetic resonance imaging (MRI) findings consistent with myelopathy secondary to multisegmental cervical stenosis with spondylosis and underwent decompression from C3 to C7.6 Improvement in myelopathy was assessed with the Nurick score. Average age was 63 years (range 36 to 92). Follow-up averaged 16 months. Postoperatively, Nurick scores improved by 1 point in 78 patients, 2 points in 37 patients, 3 points in 7 patients, and 4 points in 5 patients; 74 patients experienced no improvement, and 3 patients deteriorated by 1 point. In 2 patients there was radiographic progression of kyphosis, but in no case was subsequent fusion required. 6 patients without neck pain preoperatively developed new intractable neck pain after surgery.
Disclosures
The author has no financial relationship with the equipment companies mentioned in this article.
Statement of Consent
The patient undergoing the filmed procedure gave consent to being filmed for this video article and is aware that it may be published online.
Citations
- Mitsunaga LK, Klineberg EO, Gupta MC. Laminoplasty techniques for the treatment of multilevel cervical stenosis. Adv Orthop. 2012;2012:307916. doi:10.1155/2012/307916.
- Emery SE. Cervical spondylotic myelopathy: diagnosis and treatment. J Am Acad Orthop Surg. 2001;9(6):376-388. https://journals.lww.com/jaaos/Citation/2001/11000/Cervical_Spondylotic_Myelopathy__Diagnosis_and.3.aspx.
- Lehman RA Jr, Taylor BA, Rhee JM, Riew KD. Cervical laminaplasty. J Am Acad Orthop Surg. 2008;16(1):47-56. https://journals.lww.com/jaaos/Citation/2008/01000/Cervical_Laminaplasty.7.aspx.
- Steinmetz MP, Resnick DK. Cervical laminoplasty. Spine J. 2006;6(6)(suppl):S274-S281. doi:10.1016/j.spinee.2006.04.023.
- Ratliff JK, Cooper PR. Cervical laminoplasty: a critical review. J Neurosurg. 2003;98(3)(suppl):230-238. doi:10.3171/spi.2003.98.3.0230.
- Wang MY, Shah S, Green BA. Clinical outcomes following cervical laminoplasty for 204 patients with cervical spondylotic myelopathy. Surg Neurol. 2004;62(6):487-492. doi:10.1016/j.surneu.2004.02.040.

| Publication Date | 6/29/2014 |
| Article ID | 6 |
| Production ID | 0050 |
| Volume | 2014 |
| Issue | 6 |
| DOI | |
| https://doi.org/10.24296/jomi/6 | |