Arthroscopic Total Shoulder Resurfacing with Osteochondral Allograft
Anesthesia
- An Interscalene block was placed in the preoperative holding area.
Positioning
- Place patient supine on a Tenet beach chair with a Spider arm holder.
- Prep and drape the upper extremity in standard fashion for this procedure.
Diagnostic Arthroscopy
This step includes biceps tenodesis.- Introduce an arthroscope in the standard posterior portal into the glenohumeral joint. Make a standard anterior portal through the rotator interval using an 18-gauge spinal needle for guidance.
Insert camera through posterior portal and perform diagnostic arthroscopy
- Perform a systematic diagnostic arthroscopy
- Findings: On inspection of glenohumeral joint, there was severe grade 4 arthritis in both the humeral head and glenoid. There was an intact superior rotator cuff. There was superior labral tearing with type I vs type II tears visualized. There was a tight shoulder capsule and extensive synovitis within the glenohumeral joint
- Perform arthroscopic biceps tenotomy with an Arthrocare ablator device at the insertion of the biceps onto the glenoid labrum. Using the anterior portal, the biceps was observed to retract within the groove.
- Open-subpectoral biceps tenodesis
- Make an axillary incision as is standard for this procedure.
- Incise to pectoralis major fascia.
- Place a pointed Hohmann retractor underneath the pectoralis major over the lateral humerus.
- Place a finger retractor medially.
- Identify the biceps sheath and open it.
- Pull the biceps stump from the shoulder and whip-stitch it with Arthrex fiber loop #2 fiberwire.
- Cut the needle off and put the sutures through the biceps button.
- Drill a 2.7 mm drill hole bicortically and ream the anterior cortex with a 7mm reamer.
- Insert the button into the drilled hole and "flip" on the posterior cortex.
- Tie the suture to secure the tenodesis.
Transhumeral Sleeve Placement
Align drill using the transhumeral guidepin
- Continue the arthroscopy.
- Resect the entire rotator interval
- While viewing from the posterior portal, insert the humeral head guide through the anterior portal. This will center the transhumeral guide pin onto the humeral head lesion.
- Make a skin incision on the deltoid where guide pin contacts the lateral deltoid. Dissect down to the humerus with a Schnitt to make sure there is no axillary nerve encroachment
Drill through proximal humerus to articular surface
- Drill an Acorn guide checking the position through the anterior and posterior portals.
- In this case: A 4.5 mm guide was used. Knock pin in until an assistant can grasp it through the anterior portal
- A 5.5mm cannulated drill is then advanced over the guide pin and into the subchondral bone of the humeral head
Place transhumeral sleeve
- A transhumeral sleeve is placed over the portal dilator until visualized in the glenohumeral joint.
Prepare the Humeral Head
Insert retrograde reamer through the anterior portal and attach reamer pin
- Insert a 20 mm retrograde reamer (Arthrex) through the anterior portal, assemble reamer/drill apparatus within the joint
- Pull the transhumeral sleeve back out 5mm
Retrograde ream humeral head
- Retrograde ream the humeral head to a 20 mm depth by running the reamer on forward and pulling the reamer laterally, pressing it against the humeral head articular surface.
Remove reamer from pin and inspect area
- Disengage the reamer bit from shaft pin using T-handle.
Prepare the Glenoid Surface
Insert anterograde reamer into anterior portal and place over the glenoid
- Manipulate arm until transhumeral sleeve is centered over glenoid bare spot.
- Drill the self-tapping drill bit into the glenoid bare spot.
- Disassemble the guide apparatus
- Insert the antegrade reamer and attach shaft pin to reamer, manipulating arm as needed to allow attachment
- Once attached, manipulate reamer until centered in the nipple created by self-tapping drill bit
Ream the glenoid surface
- Ream to 20 mm until completely flat on all surfaces.
- Move camera to anterior portal to inspect reaming. Continue to ream.
- Disengage the antegrade reamer from the shaft pin.
- Reinsert the 30 mm humeral retrograde reamer and retrograde ream to 30 mm humeral flap.
Remove reamer and inspect area
- Disengage reamer from the shaft pin.
Prepare the Allografts
Cut and size humeral graft from donor humerus
- In this case: The proximal humerus graft was fashioned by using a series of sizing guides as described in my paper in the Journal of Arthroscopy (ref. 4). In this case we used a humeral graft with a diameter of 30 mm and a width of 5mm.
Cut and size glenoid graft from donor distal tibia
- Using a distal tibia I did the same for the glenoid graft to fashion a graft with a diameter of 20 mm and width of 5 mm.
Attach suture for later placement to humeral graft
- A drill hole is made through the center of the humeral graft and a suture is placed through in order to help position the graft into the humeral head defect. The suture will later be used to pull the humeral graft into proper position on the humeral head, through the transhumeral guide.
Place the Glenoid Graft
Insert graft harvested from tibia through anterior portal
- Insert the glenoid graft (in this case, taken from a distal tibial plafond) into the glenohumeral joint. Impact the graft into the glenoid position using the Chondral Dart System (Arthrex, Naples FL) using the Chondral Dart drill guide to hold the graft into position.
Position into defect
- Position the graft into defect.
Secure with chondral darts placed through transhumeral sleeve
- Place 3 chondral darts on the glenoid. Get a good fixation and press fit.
Place the Humeral Graft
Thread nitinol wire through transhumeral sleeve
- Place the Nitinol wire loop through the chondral dart apparatus and retrieve through the anterior portal.
Place graft suture through loop at end of wire
- Use Nitinol wire loop to grasp the suture previously placed on back table through the 30 mm graft
Insert graft through anterior portal and manipulate until seated
- Place humeral graft through anterior portal.
- Retrieve Nitinol wire loop grasping the suture and manipulate with a finger through the anterior portal until graft is well seated into the glenoid defect.
- Ensure a good press-fit fixation.
Closure
- Close all the portals after removal of all instruments from the shoulder with buried interrupted 4-0 Maxon sutures. Place the patient in a sling.
Postoperative Care
Due to the fact that this is an arthroscopic technique that leaves the subscapularis tendon undisturbed, rehabilitation can occur quicker than in a standard total shoulder replacement. The patient was kept in a sling for 1 week with passive range of motion starting the first week post-operatively. Full active range of motion was initiated at 2 weeks post-operatively and strengthening was started at 6 weeks. At 3 months out he achieved active range of motion as follows: forward elevation to 170 degrees, external rotation to 50 degrees, internal rotation to the L1 vertebral level. The patient had excellent pain relief, with no loss of strength or paresthesias. AP and axillary x-rays demonstrated well seated grafts with a smooth articular surface and increased joint space.
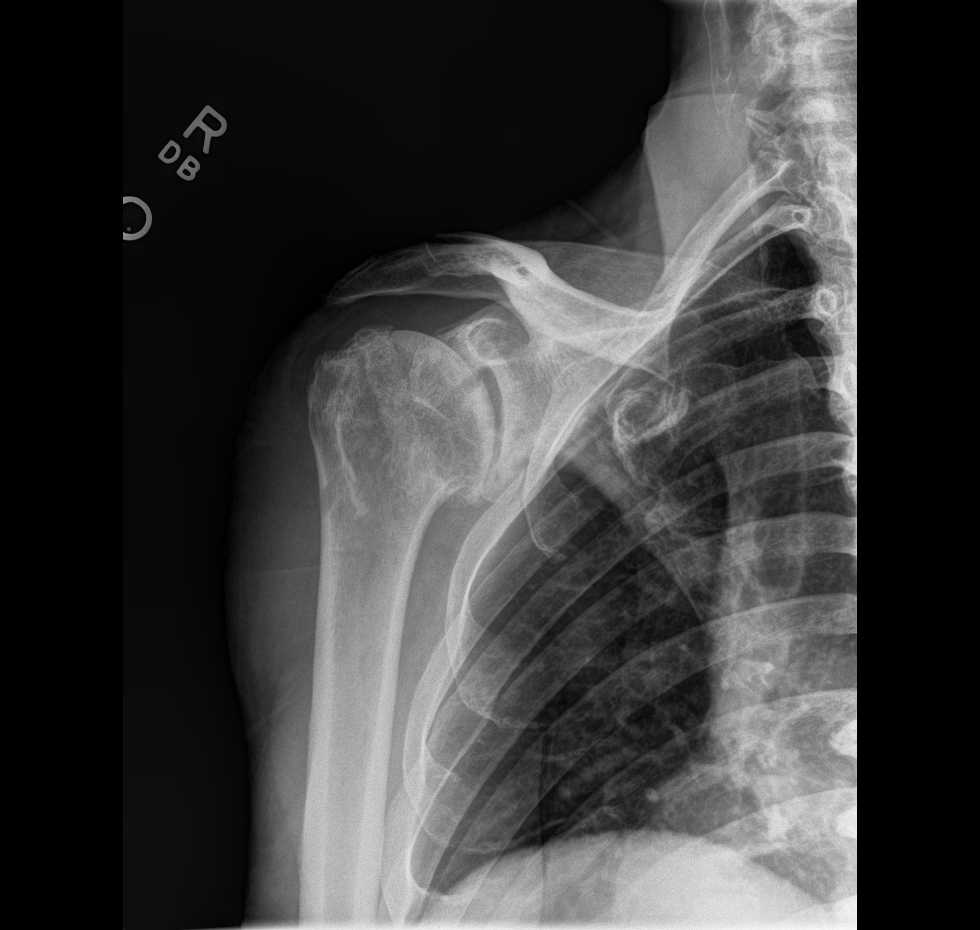 Anterior-Posterior View
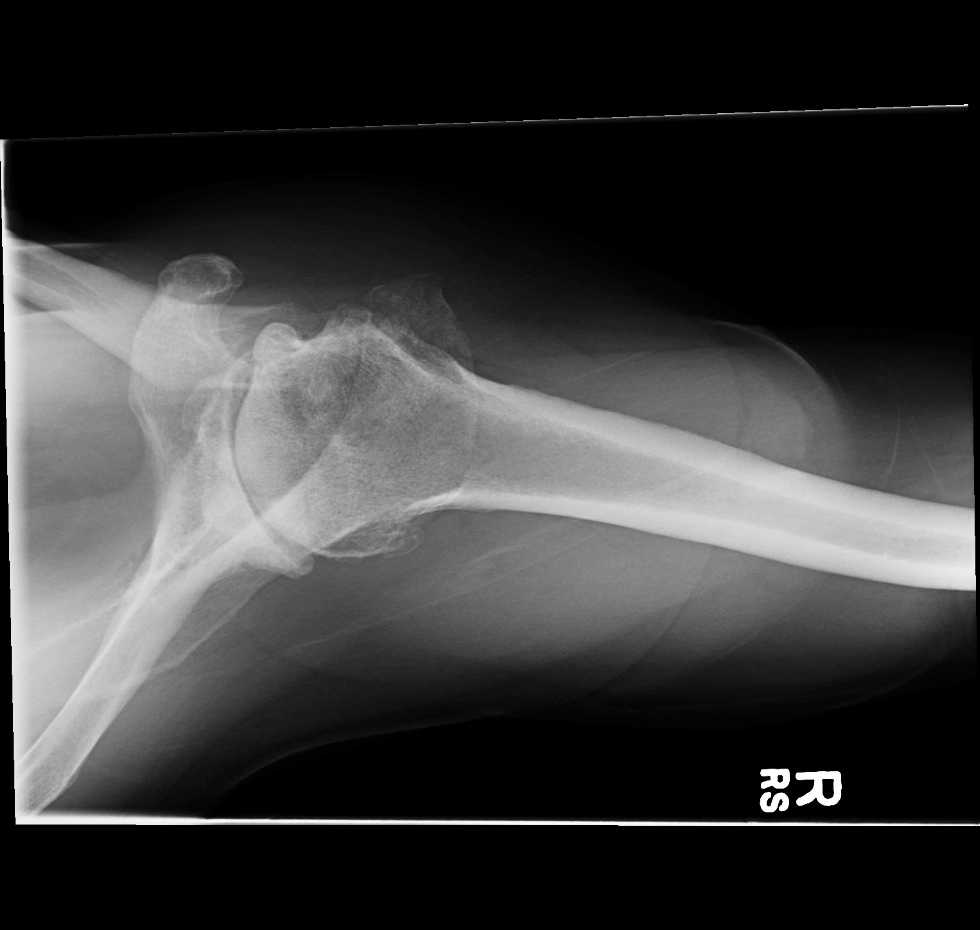 Axillary view

| Publication Date | 2/28/2014 |
| Article ID | 1 |
| Production ID | 0001 |
| Volume | 2014 |
| Issue | 1 |
| DOI | |
| https://doi.org/10.24296/jomi/1 | |