Arthroscopic Repair of Posterior Labral Tear with Paralabral Cyst Decompression
Transcription
INTRODUCTION
Today we are going to be doing a surgery on a patient who has a posterior labral tear. That’s a tear of the labrum of the shoulder in the posterior aspect and can result in patients that are symptomatic with pain, or instability, or subluxation. And all those things typically occur in positions of function. When the patients lifts their arm up, when they reach across their body, or where they axially load their shoulder, they can often times get pain posteriorly - pain in their shoulder, and that can be fairly debilitating for a lot of things they want to do, such as weight lifting, such as push ups and other just functional type activities during their day.
First thing the anesthesiologist has already done for us is he will have blocked the patient with an interscalene nerve block. That will allow the patient to have complete relaxation of the muscles around the shoulder and for postoperative pain control. So that’s first and foremost. Then the patient is brought back to the operating room where he’ll get general anesthesia. Typically, that’s done with intubation. And then the patient will be positioned. We typically will position patients in the lateral decubitus position. So in this instance, we’re doing a right shoulder. His right shoulder will be placed up in balanced traction with about 40 degrees of abduction and 20 degrees of forward flexion, and then all of his bony prominences will be padded. And then the patient basically will be prepped and draped in a standard fashion - in a sterile way. His arm will be placed in approximately 15 or 10 - 10 pounds of traction, and then the surgery will begin.
As far as the surgery’s first starts, we first will start with a posterior portal and that will be where we’ll do our diagnostic arthroscopy. Evaluate the labral tear, see how big the labral tear is, go to the remainder of the joint, make sure the rotator cuff and the articular cartilage look fairly normal. Then we’ll establish an anterior portal where we’ll place a cannula, and then the majority of the work will be done posteriorly. We’ll place the scope anteriorly, we’ll visualize posteriorly, we’ll prepare the labrum, we’ll mobilize the labrum, we’ll place anchors along the glenoid, pass the sutures from the anchors around the labrum, as long as the labrum’s sufficient enough - and if not, we may even have to augment with a capsule repair. This patient does have a bony injury in their shoulder as well. And so sometimes that can compromise, and we may have to bring his capsule in to give him some stability. He’ll be placed in a sling at the conclusion of the procedure after his portal sites are closed with sutures. And then he’ll be awoken from anesthesia and brought to the recovery room, and he’ll be there probably for about an hour or so prior to going home.
CHAPTER 1
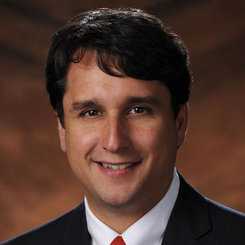
I’m Fotios Tjoumkaris. I’m an orthopedic surgeon. We’re going to be doing a posterior labral repair in this patient. You can see he’s got some nice tattoos here. So we’re going to stay away from the tattoos if we can, but sometimes that’s not possible. So this is a guy who’s dislocating or recurrently subluxing his shoulder posteriorly, and our goal here is to fix his posterior labrum. He’s got a big posterior labral tear. He’s symptomatic; every time he does pushups or bench press, he gets a lot of pain in his shoulder. So our goal here today is going to be to go ahead and try to fix that for him.
CHAPTER 2
So we prep him in the lateral decubitus position, which is where he is. We make our portals here. Our posterior portal is here. It’s in line with the lateral edge of the acromion - off the posterior edge of the acromion here. And then our anterior portal is kind of just in the anterior soft spot. We call that the rotator interval. And so we’ll go ahead and get started here by making this portal in the back. So just a small little stab incision into his right shoulder. And this is a trocar, and this trocar basically allows us to go in arthroscopically with the a - lift up his arm - we’ll try to feel the humeral head a little bit and then we try to basically bounce in his shoulder, and we think that that’s - I think that’s in there for him. So we’ll see. There’s a little bit of distension as well as we fill the joint with fluid. You can see how that just distends the joint a little bit.
So first thing we want to do is a - is a diagnostic arthroscopy just to identify our pathology. Since we’re in the lateral position, you can see the humeral head is sitting within the glenoid. Now because he’s in anterior traction you can see how he’s sitting a little bit off anteriorly. But that’s the humeral head right there. Right here is humeral head. Down below us is the glenoid, and you can see the glenoid here. Up at the superior aspect of the shoulder, this is his biceps. He’s got a little bubble there, so we’ll get rid of that. Try to get out - get rid of some fluid for us. At the very upper portion of the shoulder, there’s his biceps tendon, we’ll take a picture of that for him. Up here’s his superior labrum, and his tear probably starts up at his superior labrum. And we’ll probe that in a little bit and kind of get a sense of that. And then back here is where a lot of his issues are.
And you can really see - just in quick inspection - how he’s got this tear that kind of extends fairly extensively around the back of his shoulder. That tear kind of probably goes - if we’re thinking of this as a face of a clock, there’s 12 o’clock here, here’s 9 o’clock, and then there’s 6 o’clock down there. So you can see how he - he really has kind of torn the labrum off - almost 180 degrees around that 360 degree glenoid. Back here’s the bare area of the humerus where the rotator cuff inserts. You can see up here, this is his rotator cuff attachment back here, posterior superiorly.Got a little bubble - we'll get rid of that. So there’s his rotator cuff attachment here, which looks pretty good. So he does have a little bit of - maybe a little bit of articular cartilage marginal injury here and that could be from his pathology. It could just be just from a little bit of extensive athleticism that he’s had in the past, but - and then here you can see cuff insertion anteriorly, which again looks very good. So - one thing we will check is his anterior inferior labrum. He’s not dislocating off the front, but you can st - start to see how he does have a little bit of partial tearing down here. That anterior inferior labrum as well. We’ll drive through the shoulder. That’s his inferior glenohumeral ligament right here, and that looks pretty good. We’ll come to the front of the shoulder. That’s his scapularis muscle. The upper border of that looks a little odd but overall not too bad. The subscapularis looks attached.
Let me see the spinal needle. So what we’ll do is we’ll take a spinal needle through the front aspect of the shoulder to identify the portal that we’re going to have in the front. So that’s a little bit too medial. And looking at it here, you can kind of see where we’re - where we’re coming through. We just want to localize a nice spot because most of the work that we’re going to be doing is off the back. So we want to have a spot that we can really visualize the back real well. And so that looks pretty good. So we’re going to put a cannula up in the front. Go ahead and take that out for me, Martin. Switching stick. So again we make an incision there. Let me see the switching stick. So ma - we’ll put a switching stick in his shoulder first and that just holds our spot for us basically. Then a dilator - Martin will run a dilator over that switching stick, and what that does is it just creates a space for our cannula. And right in that interval is really nothing - nothing bad - he just has some capsule, which is just a joint lining. So we’ll come out with that - with that dilator. We’ll put a cannula - as you can see, he’s putting a cannula now on that dilator. And then we’ll go ahead and put the cannula now in his shoulder, and we’ll work through that cannula. Instead of having to continually take instruments in and out of the shoulder, now we have a nice clear path. And it’s a screw in cannula so he’ll screw that in. There you go, good.
CHAPTER 3
So first thing we want to do, because his superior labrum does look a little abnormal, we’ll come in here with this probe, and we want to probe that and see, you know, is that in fact a tear or is that just a little bit of a redundant labrum? So I’ll bring my probe in here, and you can see that actually looks pretty firmly attached right there. He’s got a little bit of redundant labrum, but it’s not torn. But back here, it definitely starts to look a little bit abnormal - so off the back of his shoulders. So, this really is more superior pathology than anything else. He does have a little bit of cartilage wear, maybe in the front, but again, that’s not too bad. This is what we call the bare area of the glenoid. That’s fairly normal here. And the rest of his shoulder - again, not too bad. He may have a little bit of fraying of the labrum down here, and we’ll certainly take a look at that. Let me see a shaver. Martin, can you lift him up a little bit for me?
So this is a motorized shaver, and what this does is it allows us to debride the labrum in kind of a safe way - without disrupting the - the things we want to preserve. So it’ll only suck in the tissue that’s more degenerative in nature. So what we’ll do is come back here and just get a quick debridement - a quick debridement - kind of clean up any frayed tissue, check that labrum a little bit. You can see that labrum looks pretty good. It’s just a little bit of - and what happens is as the - as this labral tear extends, it puts strain on the parts of the labrum that are normal, and so you’ll start to see extensive tearing if you were to kind of leave this, he’d start to tear that anterior inferior labrum a little bit. So - so now we’ll come off the back here, and we’ll do the same thing. We just want to clean up this tissue very gently. At least initially, so. And we’ll do more of an extensive debridement when we’re ready to repair this labrum. But you can see how redundant the labrum is back here and how kind of just shredded it is and how ripped off it is. So this shaver comes in and...
Alright, so next thing I want to do is really kind of look at that labrum a little more extensively. Let me see an elevator. And you can see how it is just kind of ripped off the back. It’s hemorrhagic off the back a little bit here as well. Let me see the-yea that one. So I have this little elevator that comes in. And what we’ll do is we’ll bring it off the back of the shoulder, and we’ll start to elevate off that posterior cap - that posterior labrum and the capsule. The labrum is kind of confluent with the capsule. And we kind of identified it - right here’s where it kind of starts to come off. And we’ll come off the anterior portal for this because it’s a little bit of an easier trajectory. And you can - well - well, hopefully, this - this gentleman does have a paralabral cyst. And as we get under here, you may see some - some cystic fluid escape from behind here. And we’ll do what we can from this angle cuz it’s a little bit of an easier trajectory than if we were to make it from the posterior portal. One thing you’ll know notice is my view is looking down at the labrum here cuz I do make this portal a little bit anter - lateral so that we can try to put anchors through this one portal if we can.
So, you can see that little droplet there, and - and here it comes now. You can see that - that fluid of that trapped - of that labral tear. Fluid was seeping out of the joint and that fluid was then getting trapped behind there. And so what we’re going to do is decompress that. You can see how that looks gelatinous in nature. It’s just like a - a ganglion cyst you might get at your wrist. It’s the same - same principle. So, and it’s not - there’s a study that looked at, you know, whether or not you actually have to decompress the cyst or can you just fix the labral tear. So you don’t have to decompress the cyst. But he was starting to get some early weakness in his rotator cuff because of impingement of the cyst against his superior scapular nerve, and so - within the spinoglenoid notch - so I felt like we’ve got to get rid of some of that fluid so that nerve will recover a little bit quicker. So. And that’s what we’re doing.
So we just kind of come in here and just elevate that off a little bit. And even though I can’t see the glenoid, I can feel that articular margin. And I’m just working my elevator kind of back there, and we’ll get a better look at that once I put my camera in the front. So, that’s pretty good. That’s a good case, Martin, right? For this? Definitely. Okay. So you’re elevating it off? Yea, I’m just basically pushing it back. You can see I’m working behind the labrum, underneath the capsule, and I’m just pushing it off. Because what happens is these tears - especially if they’re chronic, like his is - they heal, and they heal more medial. And then so what you have to do is kind of break up that scar tissue and recreate that - that biologic response - you know, so getting behind this like valid tissue here, so. And you can see all that cystic fluid there, so we’ll - we’ll now shave that out and get rid of some of that. You know, that - that happens moreso with these anterior - with anterior labral tears than it does with posterior labral tears. And what we’ll do is we’ll just come under here, and we’ll shave a little bit, just to try to suck out any remaining fluid that might be there. Knowing that I don’t want to go too far because the nerve does lie off that glenoid margin. So I don’t want to be too aggressive. This - this tissue here could be an issue as we get - you know.
Now for this gentleman, he’s not dislocating, so our goal really is just to restore, anatomically, the labrum back to glenoid rim. We don’t have to go crazy about really plicating his capsule or really tightening him because he’s not a dislocator, so. So if you have someone who’s a true dislocator, then you’re going to be more concerned about making sure not just that you fix that labrum but that you also reduce the volume of the capsule. So, what we’ll do is just kind of debride that a little bit. So we’ll just kind of come in here and do a little slight chondroplasty with these little - but that’s not a big deal here, so. So now what I’m going to do is I’m gonna switch my - switch my vantage point. I’m going to start looking now - now I’m going to look from the front because most of the work that we’re doing is in the back of the shoulder. We want to look from the front and work from the back. And so what we’re going to do here is switch and do the same thing - put a cannula in the back now so that we can look.
You going to go straight in? You know, let me - yeah, that’s good. Go ahead and spray that. So now Martin’s putting the scope in the front of the shoulder, and you’ll see what we have in the back. And so what we have now is this - is the view of the back. And you can now really cl - kind of clearly see that. This is our portal here. You can see this labrum that’s kind of been detached. We’ve already done a fair amount of the work already of elevating that labrum. And you can see with his arm slightly forward flexed, it really does give a great view of that posterior labrum, and so - and you can see here where the labrum is attached. See that right there? That’s attached. As we come down here, you’ll see that’s it’s not, so.
So we’re going to do the same thing that we did - let me see a knife again. So we're just going to have to make an incision a little bit bigger here. So we’ll just expand this so we can fit a cannula in the back of his shoulder too. And you can see we could come in here with a dilator first. Let me see another cannula, Dan. Yeah, go ahead. And so this is where - really where the meat of the tear is. We’re just waiting for another cannula here. So we’re gonna get that in short order, and then we’ll continue on. And you can see down here inferiorly where it almost looks like it’s reattaching right here. See that? So right there is like where the junction is of the abnormal labrum to normal labrum. And then here again - he’s starting to kind of have a little bit of strain of anterior labrum, but I really can’t peel that off. He might have some little cracks in it, but it’s not torn. And he’s not unstable anteriorly, so we don’t really have to go chasing that.
In a sling postoperatively - we used to do these gunslingers slings where we had an external rotation brace - we really don’t do that anymore. We just do basically regular sling. For the first, basically, four to six weeks. So he’ll get a regular sling for about four to six weeks or - with a maybe slight abduction, and then what we’ll do after that is start him in some passive range of motion exercises - try to get his range of motion back. And then from there progress into active assisted and then it usually starts strengthening at around eight to ten weeks. And then for guys that throw, we usually don’t let them throw again until like six months - do like a light throwing program - and then twelve months maybe ‘til full competitive throwing, so.
So now we’ve got another cannula in here and what you can see is I’ve put this portal a little bit inferior and a little bit lateral and so what that does is gives me a nice trajectory down at the glenoid. Let me see a probe. So if we come in here with this - with this probe you can kind of really, now more extensively, see that labral tear. So it goes down here, all the way down inferiorly. And it comes all the way up here, and you can see how some of that tissue is fairly degenerative. So we’ll come in here with a shaver, and we’ll just kind of clean this up a little bit. And you can see how coming from the front actually does give you a little bit of a better angle cuz we’re kind of working behind ourselves here. So we won’t be too aggressive cuz we don’t want to really take away his labrum. We just really want to debride it.
Let me see that elevator, Janet. The purpose of the labrum is to expand the glenoid surface and stabilize all that? Yeah, your purpose of - your labrum serves a couple purposes. Number one, it deepens the sockets. So our glenoid’s a relatively flat surface. So fift - fifty to seventy-five percent of our - our concavity of our glenoid comes from the labrum, and so it does that. Number two, it serves as an anchor for the ligaments of the shoulder. So the capsule comes in and attaches to the labrum. And then the labrum then is - basically attaches to the glenoid. So it’s really that - that middle tissue between capsule and glenoid. That’s why when we - we talk about fixing labral tears, but it’s really fixing the ligament, right? It’s the - the labrum provides some stability but it’s really, it’s the ligaments that are providing the stability. And what we’re going to do here with an elevator is kind of just come off the back of his shoulder, and we already did a pretty good job elevating this. And so he’s kind of just right - right there. So that’s pretty nice. So we’re just - yeah, I’ll shave it again. But this angle is a little bit tougher than coming in anteriorly. Anteriorly is actually a lot easier, and what we do is we just kind of really create a nice space there.
Feel like I got to come in front again. You’re okay Martin - let me take it here. So he’s - and with him, his labrum here is a little - is a little attenuated up top, so what we’ll do is we’ll incorporate some of the capsule into his repair. So our goal here is to just aggravate this - this tissue down here to provide a nice healing environment for his - for his labrum to heal back - cuz just cuz you fix it, doesn’t mean it - it heals. So we really want to make sure he gets a good biologic healing response. Let me see this here - let me look down here. And you can start to see there that - that glenoid articular cartilage margin is - is pretty beat up. We’re going to definitely want to cover that. Pretty good. So that’s nice. We’re done to bone. We get rid of that kind of sclerotic bone. And what you see is the labrum is pretty much confluent with the articular cartilage, and so you’ll - you’ll start to see these little cracks in the articular cartilage. So a little bit of early arthritis from this - from this instability too - but not bad.
Untreated, it could be bad? It could, yeah. Untreated, what happens is, if you see - sometimes you’ll take care of guys who’ve had this going on for years, you know. And you’ll actually start to see the - like this area too, where they won’t have articular cartilage, so - cuz they just start rubbing that humeral head over that - that posterior labrum, and there's no - there’s no buffer there. There’s no tissue there to help protect it. So, again, we don’t want to take away too much labrum here. We want to preserve tissue, and you can see - that’s what you want to see. You want to see some bleeding from that tissue to indicate that there’s - there’s going to be a biological response here when you’re done. That you’re not just going to put anchors in and - and leave. You might not get healing, so. Let me see that elevator again. Do you have a more steep angle one?
So what we have now is this elevator has a little bit of a steeper angle, and we’ll come in here. We’ll - we’ll really want to make sure that we do get off that edge. And there it is. So there’s the edge of his glenoid right here. You can kind of see that right there - how it starts to dive back. And we’re pretty well beyond that, and there’s some bleeding back there. I think we got most of the cyst too, which is great. And we’ll work that edge a little bit so that we can freely mobilize this. Back there. Maybe that’s a little bit more of that fluid. That’s great. There we go. So now we’re kind of freely beyond that labrum and it’s - it’s getting a lot more mobile. That’s what we want. We want this tissue to be easily mobilized, so we can really pull it back. And there’s more cyst. You can see that coming out. So that’s - that’s nice that we’re able to kind of really get in there and pull that off, and you can maybe even see - look down there and see that little cavity where that cyst can collect. So we’re able to kind of really pull that off, which is nice.
Is there bone in that? Do you think there’s bone in that? Does that look like some bone? It does, doesn't it? In - in the tissue that you reflected? Yeah, right here. Looks like there’s even a little bit of bone in that piece. Isn’t that weird? Like that bony - that he’s a little unstable - he’s got a little bony bankart back there. So… not too bad though. We may just decide to incorporate that into our repair or see if it’s big enough - a small piece. So you - what you can see in here is that he does have this little piece of bone within that labral tissue. It’s hard to see, but I can feel that as I - right in there - that’s actually a small piece of bone. And we’ll just kind of expose that a little bit. So that’s a little - a little unusual that he’s got that, but… Yeah, see that? What’s going on there? No, that’s actually from his glenoid. So he’s getting a - so what we may do is see if we can’t kind of wrap our sutures around that, but his labrum over top of that area is getting really thin. So we’ll see. Kind of an unusual… You can his capsule’s starting to get really…
So I think what I’m going to try and do is see if I can’t pass sutures around that and put that back up where it belongs. So I think that’s what we’re going to do. Let me see that shaver again. I'm going to put an anchor in first, Janet. Martin, move a little forward for me. Yep. So yea, his - his - his, basically, glenoid pulled off with his labrum. So rather than try to peel the labrum off of that piece and destroy it, we’ll pass our sutures, if we can, and that can be a little challenging. We’ll try to pass our sutures around that whole complex, and see if we can’t just get the whole thing cuz you can see what’s happening here - it’s just kind of like falling off, so. Alright, so. Let me see that elevator again. I just want to see how far down I elevated. And that’s basically the inferior extent of his tear. So we got a nice big bony bankart piece here. That’s not great Martin, you know? Look how his capsule’s like going back there too, see?
CHAPTER 4
So what we’re going to do now is put in one of our first anchors. So we’re going to come down here to the inferior part of the glenoid - right there - right where the inferior extent of that tear is. And what we do is we drill into the glenoid, and then we have these anchors that are about 2.3 millimeters that go along that margin. Mallet. And these anchors are fairly strong, and what they do is they have sutures through an eyelet - and that those sutures can slide, and you can see we’ve got another suture. We give it a little tug to make sure it’s nice and stable. Let me see that spectrum there.
And now our goal is to pass those sutures around that capsule, around that labrum, and try to get that labrum to heal back. So we have this suture hook device, and what we’re going to do with the suture hook device is use this almost like you would just to suture on needle. And we’re going to come through his capsule down there. We’re going to poke through that. We’re going to bring it up and around his labrum. And we’re going to shuttle that suture through. And we use that blue prolene suture - or PDS suture. We’re going to use just as a - a suture shuttle. Okay. Retriever. So now we have that through the labrum, we have it through the capsule, and we grab this retriever, and we want to grab a couple of things. We want to grab the suture that we want to pass through the labrum, and we want to grab the actual suture that we pass through the labrum. We pull them both out. We pull them both out of the cannula. Hold that for me, Martin. Create a little knot in this one, and use it basically as a shuttle device. And they do have commercially available shuttle devices, but this works just as well. And what you’ll see on the screen now is - you’ll - you’ll come through, and you’ll pass that suture through. And now you’ve got this suture that’s now through the labrum - through the capsule, and that’s going to repair that back to the glenoid margin.
Let me see a knot pusher. So our goal now is going to tie that, arthroscopically. First thing I’ll do is run this knot pusher down to make sure my cannula is nice and clear. And then we’ll tie this down. And we usually, typically, will use a sliding, locking knot. I use a Weston knot, which is a sliding, locking knot. And as we do that, we’ll come down. We’ll put our knot on the back side so it doesn’t impinge on the joint, and we really want to suture that tissue down. You can see the quality of his posterior capsular tissue is not great. As long as we get that labrum back with that capsule we’re in good shape. And so we’ll - so we tighten that down. And we’ll basically do that up the entire posterior glenoid rim. We will - we’ll march this up and really tighten that space, so when he goes to internally rotate or do anything really strenuous, he’s going to come up against that wall of labrum and capsule, so.
So we put alternating half hitches there that lock, and then we - we really secure that knot back down, okay? Trick here is going to be that - that bony piece, which we did see a little bit on his MRI, but it’s such a thin piece, sliver of bone that - alright, let me see that - this again. So now we’re going to come up that, we’re going to march with each anchor - we come up a couple millimeters. We try to space the anch - the anchors apart by 2 - about 2 or 3 millimeters. And you can see how I don’t come off the back of the glenoid. I - I really want to try to get it up on the face of the glenoid here if I can - and really try to get that tissue back up and over. And I kind of pulse the drill. Good, okay. Mallet. Okay, and now I’m going to do the spectrum. So now we’re going to do the same thing. We’re gonna - we’ve got a really deficient posterior capsule, so we’re going to try get what we can here from this tissue back here. So he’s got some capsule - some bone down here - and we’re going to try to come completely around this tissue. So I’m kind of coming off the back. You can see that - that suture hook coming in. And we’re going to come through this whole complex and see if I can capture that inferior aspect of that bone. I’m gonna try and come up right between those sutures if we can - looks like that should be pretty good. And we do the same thing, we’ll shuttle this - this one around as well.
Retriever. Oh this capsule just went away, didn’t it? I normally have a little bit of capsule to close at the end. Close behind yourself, when you’re done? Yeah, I don’t think he will. So again, we’re gonna just shuttle that through, and I think for this one - next one - Janet, I'm going to use the crescent, which is the - more of a flatter one. Let me see that knot pusher. That’s too anterior. Yeah, I like that one, yep. So that should be good so, okay. So we’ll do the same thing here and really, that’s as much tissue as we can really bring forward there cuz he’s really deficient in posterior capsule. It’s really thin. And again, we try to tie our knots back off the glenoid rim so that we don’t get knots. And you can see how as we march ant - superiorly - how that - that labral tissue is now sitting up with that piece of bone. That piece of bone used to be really posteriorly. But we’ve elevated it up, and hopefully, we’ll be able to kind of lasso it and get it to kind of be part of this whole complex cuz to take it out would destroy his whole posterior labrum. Posterior labrum is a little bit different than the anterior labrum. It doesn’t have as - the thickness - it doesn't have the consistency, so it gets a little bit thin back there by the capsule. So we try to do as much tissue preserve - preservation as possible back here. Okay, let me see that anchor again.
And you can see how this capsule back here has really started to kind of go away as we’ve used our shaver and just tried to mobilize. It’s just kind of gotten so thin. So here I’m going to come - I want to come like right there and try to pull that up. So we’re going to come up on that articular defect - almost like a soft tissue arthroplasty. Okay. Looks pretty good. We worry about that bone being a little soft, so we don’t shut - we don’t shave it too much. Let me see the crescent. So now we have a little bit more of a flatter curve that we’re going to come in here, instead of just a - a big hook, and we’re going to see if we can’t lasso this piece around. And it’s a little bit of a challenge, but I think we’ll be able to get it right there with that, and we have to be pretty careful in terms of how aggressive we are going through it. We don’t really want to disrupt that tissue at all. That tissue’s very fragile.
I almost feel like that labrum there’s superiorly is not attached anymore, don’t you feel like that? Retriever. Right there. Yeah. Yeah, I think that you’re right. Yeah I mean, like did it just rip through? Did this tissue - did this just rip through? Like did it come - did it just rip through here like - is there a tear here? Shoot, I don’t think so. No, I don’t think so either. Alright so maybe I’ll shuttle that and see. I just want one loop. There we go. I sort of have it. Yeah, okay. And we’ll see if I can try and tie it down inferiorly and direct it. That’s good. Oh wow. It didn’t really go around, did it? Maybe it did come out like you said. Let me see a retriever. So my concern here is that he might have a little discontinuity of his labrum up there from the elevation and just kind of how thin it is. So we’re going to have to see if it’s not wrapped around fully. Yeah. He’s got a little defect in his labrum. So that will be good to kind of see how we try to address that, which can be challenging. So we just kind of are going to come out. He’s got a defect there, huh?
So what can we grab? Let me see a probe. So right here he’s got a little bit of a defect in the labrum, but it doesn’t look like it, it looks like it’s still attached right here. See? Or is that - yeah, yeah. Right there. So maybe I’d take this as mattress and this as a mattress like through it and bridge on both sides. Maybe that’s what we’re going to do cuz this is just ripping right through that piece of bone. If we could just tack that, and then tack this - two separate. What’s that? Tack and - tack on either side. Could you do that? Tack that one there. And then come on the other side. Tack it here and tack it there. Yeah but here it’s going to just going to cut right through. It’s going to come right around, you know what I mean? And he doesn’t have any capsule back there. To really grab, see? This capsule’s really deficient. This poor guy. I think what we’re going to have to do - and that labrum just went - was so, so thin. I think I’m going to come through. That’s just so low - that anchor. Try to come through - like around that anchor. Hold it in like that, you know what I mean? Let me see the - the other spectrum if you can, Janet. Yeah. Challenge. That’s how it goes!
So we’ll try to work it. We got to find something for him to get - to get it fixed. So I might try to lasso him a little bit more inferiorly. Without cutting that suture - that’s the only concern - you’re going to cut his labrum there. Cuz that piece of bone is really just - if I get rid of that piece of bone, he’ll have nothing there. Let me see if I can actually come right - no, see? He just wants to slide right off. I’m worried about that bone. Yeah. Hmm. What do you do? What can we do with this? Now, kind of have to rework it a little bit I think. Maybe… That capsule’s just gone. Can’t - can’t pop through that piece and then pop through this and kind of grab all of that? Down here? Yeah. No, cuz I risk cutting that suture out, and I’ve got a nice repair down there. You know? I risk that. I could put one higher and then literally pass one to one and tie it like across, like a bridge cuz he has tissue here, you know? But let me see that - that crescent again. I kind of want to see if I can’t find a conduit through that thing that will - that will get me up. See what we got here. Well, that’s why they - that’s why they come to us, Martin. Yep.
I want to try to get - yeah. There’s like some tissue here that if I can get - and then I can come up higher and get the rest of his labrum, you know? Yeah, and you just bridge both pieces like a radial tear and labrum - just right below it. Yeah, but it just skies off, Martin. Yeah. We’re not going through the piece of bone. It looked like it was but - it did. I think it was. Get out - I’m going to try to - I’m trying to think about even going through that piece as long as it doesn’t fragment, see? You can see it separating there, see? Question is what happened to that spectrum, you know what I mean? Is it getting dull? But you passed it - you’re through. Is it going to just fragment that piece? I don’t know. It’s worth a try. Yeah. You can see that piece of bone is just really hanging on. Retriever. It’s staying in that spot, so that’s - that’s a positive - whereas before it had kind of flipped around the labrum. Okay.
So a little curve ball. And now the moment of truth here - if it will pass through that. I think so. So that’s good. That’s kind of a little bit of a save there cuz we were going to get to the point where we would have had to bridge that defect. So now my goal is to try to see if I can’t sandwich that in and maybe with the next suture, bridge that defect. Hopefully it doesn't rip out. I don’t think so, though. Looks pretty good - looks like pretty strong. Pull the cannula back a little bit, Martin. Yeah, that’s okay - don’t... You don’t have to put it right on it. Huh? Trying to hold it back a little bit for you. Hold the piece back? Yeah. That’s alright. The sut - it’s - the suture’s going to go down to it, so. I’m going to pull that little piece up, but that’s okay. You know - yeah, I’m going to put another one in this. I don’t think I can get through that bone though - the other one. See it’s just - I - I got to be careful how tight that is because it could just swish - he has a very thin posterior capsule. You can see how just manipulating his posterior capsule has already caused it to - you know, to kind of go - go away, so we have to be careful about how tight I even tie these sutures.
Alright, so we got that. Okay. Now we got - so we got him marched up the back a little bit, here he does have a little bit of a labral defect, and the goal is maybe to - to see if I can’t come here and get some capsule around that. You know, like does he have capsule back here? I think he does. And so I’m going to try to get - see that piece is just flipping up, Martin. An issue - that piece is going to be an issue. Let me see a shaver. I’m going to have to get rid of that piece of bone and just use his capsule. I think And - and then maybe you can advance that little piece - move it down a little bit - just fill that. What’s that? Tie it. You can just - this superior piece - maybe you can advance a little bit to - inferiorly - just a little bit to try to - try to and fill that? You know? Just thought of it. You can’t advance the labrum. You can’t? No, it’s not like a - the superior labrum you can’t advance, like - plus, you’ll make them tighter. So the question is is there going to be capsule back there that I can really get to - that I can pull up? A little tough one. A tough one - because he’s got like nothing back here to - he’s got like no tissue back here to pull up. Could you pull your cannula back a little bit? Grab that. There’s no - that looks like capsule tissue above you - is that? Yeah, but that’s above me. Can’t pull it down? But then how are you going to tie it? Good question. Yeah, I think I might want to do that though and take that and pull it down to the rim and pull that over here. Maybe as your last stitch, you do one like that maybe because you said you’re going to close yourself out. Yeah, normally I do.
Let me see that shaver again. Just worried about how thin that tissue is. It’s like - yeah, we repair that piece of bone, but this piece just kind of flipped up right on the opposite side of it. So we got to try to get that out of the joint. And you can see here he’s got… Going to have to do a capsular plication in him because he doesn't have - he doesn't have good labrum back here, and so I think what I’m going to have to do is grab his posterior capsule here and pull it down just to close down that space for him. So we’re going to try to do something different a little different cuz his whole posterior capsule is just kind of going away.
I’ll put this in first. We have to get a little creative here. Got you. But we’ll see. We’ll make it work. Not sure if I like that spot. Let me see if I can maybe come past - just past that one, and do it to the margin, you know? Okay. Mallet. That’s good. And now, take it down like through a mattress, I think. You know what I mean? And I have to tie it blind. Definitely. And tie that blind. Let me see a penetrator. So hopefully we can get some really good bites of this capsule and get through him. Like I said, his capsule’s extremely thin. Here it’s a little bit better, and maybe we can grab it and pull him in. Ah - that suture, hopefully that suture didn’t… Did that go thorough? No. See? It’s just going to rip right through his capsule. Did it rip right through? I don’t know - or it didn’t go through. I don’t know what the heck… I thought it was through. Yeah, it did. It must have. Because… You know what I'm going to do? Let me use that straight spectrum again. I think that’s a little less traumatic, and we’ll still achieve that same desired result here.
He doesn’t really have labrum now in the back. He’s really deficient. Once we elevated that bony piece, it just kind of - his labrum was just kind of not… So what we’re going to try to do is see if we can’t get his capsule now to act as his new - go ahead, Martin, hold the scope. Only problem is how are you going to shuttle that? I can’t shuttle that this way, you know what I mean? Janet, let me see the straight penetrator. Let me see retriever. No, no ratchet - just the straight. So we’ll come in through here and, yea, yep. We’ll get the superior one, I wanna get that one it’s… So we'll come in through here and - past him. Let me get the superior one - I want to get that one that’s… Of course I’m filming this thing… Okay. Okay. Let’s see if that will shuttle… See I think that’s ripping through his capsule every time. Oh no. It looks good. That looks pretty good. So that looks like it’s going to be a good suture. And then what I’m going to do is now - let me see that straight penetrator - see if I can’t penetrate a little inferior to that. And this is going to close us out. So this is going to be our final suture cuz it’s going to really just kind of close us out of the shoulder cuz we got - we really got to repair inferiorly. And now this is just to close them up, superiorly, cuz once I tie this suture down, we’ll be out of the shoulder unless we make another portal.
And that’s the - this is the hard part here, getting it - and a - a piece of capsule that you really want, that’s really healthy. That doesn’t look too bad. The problem is this - this suture is like all the way down here. I think that’s it. No, Martin, you - let go. Okay so now I have these two. The - the only issue is that could rip through, and so we’re going to have to see if it - if it rips through or not. And we’re going to bring his capsule down. You know? See what - see what that will do. It will just give him a capsular curtain over top of his labrum instead of his labrum. Because his labrum is really - and again, like we talked about, the labrum is the - is the capsule. That’s what you’re trying to - you just have to be careful here. Martin, hold that like that for me because I do not want to have the knot come through. We really got to get this thing to work for him. Only downside here is we have to tie kind of in a blind fashion, so we’re tying really just to - and I think overall he’s still going to have a very nice capsular repair, but his labrum is just…
So him - we’ll - we’ll definitely protect on the sixth weekend. He’s going to get a six week kind of a postop course of - in - in a sling - really be careful of his external rotation and internal rotation - really protect him from that. And that just flipped, so I could feel my knot flip on the opposite side of that curtain - and get that capsule to heal. And you can see that’s the - that’s my past point, right there. So we definitely tightened him up in the back. So a little unusual - we don’t usually have to go to the capsule like that, but he had a little bit of a amputation of his labrum as we were working superiorly. And so we had to kind of change course.
CHAPTER 5
Let me see a probe - cuz I can still get the probe in from underneath. And now I really can’t even - I can’t get through there now, which is nice. So he’s got a nice - nice repair. And down here, he still has labrum, which is good. And now we’ve actually made that little bony defect extra articular, so he can heal that to the posterior rim and - and up here, there’s his superior labrum. So that’s where his superior labrum was. And you can see the labrum coming around here, but he really just started to get really thin as we went around the back. And as we - as we were elevating that off, we just lost that - that - that continuity of the labrum. I don’t know, how do you feel about that, Martin? Yeah. It’s actually not bad. It’s actually nice and stable, and he’s pretty… He’s - and down there he’s got labrum, so he’s still pretty good. I think if he heals that - so I think that if he heals that, he’s going to do really well. The question is, you know, is he going to heal that. He’s very a big guy, and his capsule’s really thin. So we got to make sure that he - we really protect him postoperatively.
So we just got finished with the surgery. Overall, you know, things were - went pretty well. You could see that we decompressed the paralabral cyst, which was really nice. That should really help his suprascapular nerve pain as well as the mild weakness that he does have in his shoulder. That should really help that. One of the issues with that, as we were elevating off that posterior labrum, you could see that little bony bankart lesion - that reverse bankart lesion - that was in his shoulder. And as we started to elevate that, you could see how fragile that posterior labrum was, and it really started to almost fragment apart with that bony lesion. So we kept that bony lesion in place. We placed our anchors up on the posterior glenoid rim, and because of the deficiency in the labrum, we actually had to incorporate some of his capsule back to give us that posterior capsular buttress so he doesn’t get that posterior instability. So, this case was a little more complicated than your average posterior labral repair where we just go in and put anchors in and pass the sutures, but overall, I think the patient will still have a good result as long as we can get him postoperatively - kind of maintain that sling for a short period of time. So - but overall, we're happy with how it went. Just a little complicated by the fact that his labrum got compromised in that one area, so. So we’ll see how he does, but overall, you know, I think things will go pretty well for him.
I haven’t had one like that - for a while? In like 5 years - where like we went in there and as we elevated that bony piece off, you just saw the labrum basically almost melt away, and that shaver just kind of took it away very easily. So that was probably - I was hoping this would be a lot more routine. So it would be like, boom, boom, boom - anchors, labral stitches - like the video I sent you. You know what I mean? That was like - that’s how they mostly go. So this was - that was probably a good example of how like it can - that can be the toughest scenario right there.
Results are pretty good. Anywhere between 90 to 95 percent in terms of stability. Now in terms of people getting back to sports in a high level, that can be 85 percent or so. So while the results are really good, there’s always room for improvement in orthopedics, and I think we’re always going to be pushing the envelope in terms of trying to get the optimal results for our patients.
So postoperatively, the restrictions for the patient - we place him in a sling postoperatively. The sling will hold him in slight abduction. It will allow for healing of that capsule, healing of that labrum. We’ll typically use that sling for about 6 weeks. During that 6 weeks time, the patient will be able to do wrist and elbow motion, some gentle passive motion where the opposite arm moves the shoulder - but nothing really more than that. After 6 weeks, then we aggressively work on getting full range of motion through both passive and active motion strategies, and then by about 8 to 10 weeks, as long as the motion’s fairly good, then we’ll transition to doing strengthening exercises, focusing on rotator cuff strengthening and trying to avoid positions where we could load that posterior labrum. If at - if at 4 to 5 months, the patient has pretty good range of motion and fairly good strength, I’ll release him to - to light athletic activity, and at six months, if he’s doing fairly well, we release them to full activity. For those patients who throw - now this patient is not a thrower - but for those patients that throw or play baseball or overhead pitch, we’ll typically start a light throwing program around 6 months and progress that throwing program to a full year, ‘til they go back to hard throwing.
I think they’re both great to work with. I think it’s a little bit easier to work with football players because you - you - there’s a little bit of more margin for error, let’s say. You know, when you tighten them up a little bit, it’s okay. They’re going to be tight. They’re going to appreciate being a little bit tight. Whereas throwers, it’s a delicate balance for their shoulder. So they’re a little bit more - you get a little bit more apprehensive and a little higher sphincter tone when you work on - on throwers, so. So we enjoy the football players by a little bit more, but they’re bigger and tougher to manipulate in the operating room. So - so it’s - it's either-or, really.
So as far as contraindications would go for this procedure, patients with significant bone defects, might not be good candidates for an arthroscopic approach. So patients with large bone defects, patients with maybe nerve injuries, may not do as well - that you might want to be a contradiction. Patients with active infections as well as patients who are unwilling to comply with a postoperative regimen. So if I had a patient that told me, “The day after I get my surgery, I’m going to go out and try to play football.” Well, that’s not a patient you really want to invest in a surgery where they could go out the next day, rip out their repair, and could compromise their ultimate outcome. So I think those are the - the main things that we certainly worry about in the preoperative stage.
Basically be strict with - in terms of what they’re doing postoperatively. We don’t want them doing active motion too soon. We want them really protecting their shoulder - not putting excessive strain on it - so not lifting weights before they have their motion so that they don’t get too stiff and, at the same time, not doing anything that could stress that posterior capsule. Getting good night sleep too is also very important for patients. I’m emphasize that - that’s when our body can heal, and so that’s certainly a part of the postoperative process as well. And really good pain control so that they can participate maximally in therapy. We don’t want patients in agony to where they really can’t participate in therapy and get the best surgical result possible.
Yeah so when somebody has traumatic or macro instability of their shoulder where they do actually dislocate, as opposed to our patient today who has more of a posterior subluxation, you’re not just going to repair the labrum; you’re also going to incorporate that capsule and do a capsular plication as well. You’ll do that in the instances where they have deficient posterior capsule, but you’ll also do that in instances where that labrum needs to be really bumpered up so that they don’t continue to dislocate out posteriorly. So - so we - we def - definitely do a little more stout repair. For patients that just have symptomatic mild subluxation, you don’t want to overtighten those patients, and for patients that are throwers - the high velocity throwers - overhead athletes that pitch 80, 90 miles per hour - you want to make sure you’re not over tightening their shoulders to where they can’t go back to that activity again. So, you know, you’re always going to probably be too tight in football players and err on the side of tightness in people who do very strenuous things and err on the side of a little bit more loose in patients that are - are throwers. So I think too loose is better in throwers and too tight is better in - in NFL or - or football players - players.
With regards to the anchors that we use, we’re - we're - some - some people are kind of transitioning to more of a knotless anchor where you don’t have to tie in arthroscopic knots anymore, and that’s really more just on surgeon preference. I mean, I think people are starting to use them a little bit more. With the labral surgery itself, the sutures that we use are fairly high strength. People are starting to come out now with labral tapes, which are a little bit thicker sutures, and they might - I think we might start seeing those come back in the next 5 to 10 - 5 to 10 years or so. We might see - start to see more labral tapes - more knotless types devices - that provide good - the same pullout strength. For a lot of us surgeons that still like to tie knots - to really titrate how much pressure we’re putting and how - how tight we’re putting that capsule - particularly posteriorly where you’re concerned about excessive tightness and where you could rip through the capsule. So the arthroscopic technique currently is fairly modern. This is actually a pretty modern technique with suture anchors - with the high - high strength sutures that we use, and so - but I’m sure - who knows what’s going to happen in the next five to ten years. We never know where we’re going to be.
| Publication Date | 4/20/2014 |
| Article ID | 3 |
| Production ID | 0028 |
| Volume | 2014 |
| Issue | 3 |
| DOI | |
| https://doi.org/10.24296/jomi/3 | |